Druid集群模式安装以及测试
0 基础方面
基础方面可以参考文档:
1 机器
cdh218 coordinator router
cdh217 middleManager historical
cdh219 middleManager historical
2 安装
2.1 下载安装版本
wget http://mirrors.tuna.tsinghua.edu.cn/apache/incubator/druid/0.16.0-incubating/apache-druid-0.16.0-incubating-bin.tar.gz
2.2 修改配置
#假设安装在/opt/modules/apache-druid-0.16.0-incubating 目录下
cd /opt/modules/apache-druid-0.16.0-incubating
2.2.1 common配置
cat > conf/druid/cluster/_common/common.runtime.properties << EOF
druid.extensions.loadList=["druid-hdfs-storage", "druid-kafka-indexing-service", "druid-datasketches","mysql-metadata-storage"]
druid.startup.logging.logProperties=true
druid.zk.service.host=cdh217:2181,cdh218:2181,cdh219:2181
druid.zk.paths.base=/druid
druid.metadata.storage.type=mysql
druid.metadata.storage.connector.connectURI=jdbc:mysql://10.57.30.217:3306/druid
druid.metadata.storage.connector.user=
druid.metadata.storage.connector.password=
druid.storage.type=hdfs
druid.storage.storageDirectory=/druid/segments
druid.indexer.logs.type=hdfs
druid.indexer.logs.directory=/druid/indexing-logs
druid.selectors.indexing.serviceName=druid/overlord
druid.selectors.coordinator.serviceName=druid/coordinator
druid.monitoring.monitors=["org.apache.druid.java.util.metrics.JvmMonitor"]
druid.emitter=noop
druid.emitter.logging.logLevel=info
druid.indexing.doubleStorage=double
druid.server.hiddenProperties=["druid.s3.accessKey","druid.s3.secretKey","druid.metadata.storage.connector.password"]
druid.sql.enable=true
druid.lookup.enableLookupSyncOnStartup=false
EOF
2.2.2 其他配置修改
将core-site.xml,hdfs-site.xml,mapred-site.xml,yarn-site.xml四个配置文件放到conf/druid/cluster/_common/下 然后把mysql-connector-java-5.1.47.jar 放到 lib下
2.3编写启停脚本
2.3.1 启动脚本
cat > start-role.sh << EOF
#!/bin/bash
usage="Usage: start-role.sh  (broker|coordinator|middleManager|router|historical) "

# if no args specified, show usage
if [ $# -le 0 ]; then
  echo $usage
  exit 1
fi
server=$1
path=conf/druid/cluster

if [ $server = "historical" -o $server = "middleManager" ]; then
    bizpath=$path/data/$server;
elif [ $server = "coordinator" ]; then
    bizpath=$path/master/coordinator-overlord;
elif [ $server = "broker" -o $server = "router" ]; then
    bizpath=$path/query/$server;
fi
echo $bizpath
echo "nohup java `cat $bizpath/jvm.config | xargs` -cp $path/_common:$bizpath:lib/* org.apache.druid.cli.Main server $server> $server.log 2>&1 &"

nohup java `cat $bizpath/jvm.config | xargs` -cp $path/_common:$bizpath:lib/* org.apache.druid.cli.Main server $server> $server.log 2>&1 &
EOF
2.3.2 停止脚本
cat > stop-role.sh << EOF
#!/bin/bash
usage="Usage: stop-role.sh  (broker|coordinator|middleManager|overlord|router|historical) "

# if no args specified, show usage
if [ $# -le 0 ]; then
  echo $usage
  exit 1
fi
server=$1
pgrep -f $server |xargs kill
EOF
2.3.3 赋权
chmod +x *.sh
2.4 复制到其他节点
scp -r apache-druid-0.16.0-incubating ...
2.5 每个节点组件启停脚本
cdh218:

cat > runcomponent.sh << EOF
nohup java -server -Xms15g -Xmx15g -XX:+ExitOnOutOfMemoryError -XX:+UseG1GC -Duser.timezone=UTC -Dfile.encoding=UTF-8 -Djava.io.tmpdir=var/tmp -Djava.util.logging.manager=org.apac./start-role.sh coordinator && ./start-role.sh router && ./start-role.sh broker
EOF

cat > stopcomponent.sh << EOF
./stop-role.sh historical || ./stop-role.sh middleManager
EOF

cdh217:

cat > runcomponent.sh << EOF
./start-role.sh historical && ./start-role.sh middleManager
EOF

cat > stopcomponent.sh << EOF
./stop-role.sh coordinator || ./stop-role.sh router || ./stop-role.sh broker
EOF

cdh219:

cat > runcomponent.sh << EOF
./start-role.sh historical && ./start-role.sh middleManager
EOF

cat > stopcomponent.sh << EOF
./stop-role.sh historical || ./stop-role.sh middleManager
EOF
然后每个节点执行./runcomponent.sh 即可
3 测试
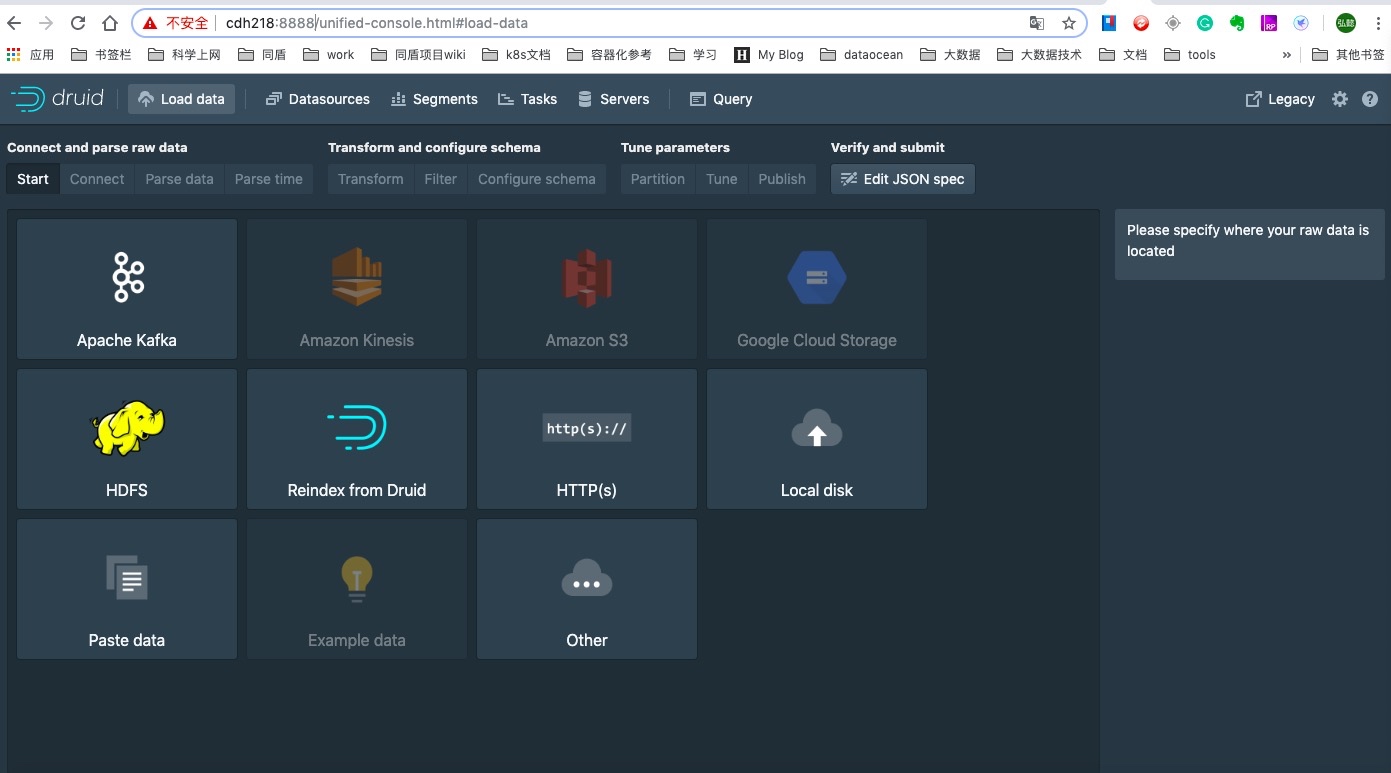
进入监控页面,地址为安装router组件的地方,端口可以从conf/druid/cluster/query/router/runtime.properties中druid.plaintextPort查询

参考文档
4 坑
- 默认临时文件生成在var/tmp下,由-Djava.io.tmpdir=var/tmp参数决定。需要手动创建。